Ideally, looking around at the current standard for 'Idents' in televisual broadcasting and commercial advertising, giving a student a broadcasting outfit from which to progress from, in regards to research, is fairly helpful. In fact, the BBC has been creating 'Idents' for over 50 years, and that's before the word 'Ident' was even thought of!!
I, personally, wanted to go with a digital company that broad-casted programs that held my interest and also had a great deal of subject matter through that 'casted material I could put to use...
And so, having researched the BBC most recent batch of 'Idents' and created a board for them, I settled on creating animations for the Sci-Fi channel, a channel which has an extremely varied listing of programs, including updated Sci-Fi favourites such as Dark Angel and Medium, as well as brand-new seasonal shows like Eli Stone and Sanctuary...this isn't advertisement for them, honest - I'm just enthusiastic for the channel and this projects possibilities...
Right, the BBC's 'Idents' are the broadcasters chance to display the skills of some of the best (tele)visual entertainment-inspired media technicians creating some fantastic graphics and top-class photography and cinematography this side of Hollywood movies - I'm a big fan! The subjects they cover vary wildly, from awe-inspiring landscapes through to mystical faeires in woods through to Maisai tribes in outer Africa...
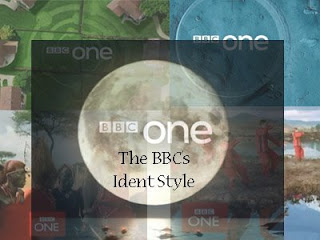 ^The subject matter of the crop circles in the top left and the moon's surface scarred with pits and impact craters are definitely relevant to my chosen channel and its requisite material, but I will take these 'Ident' designs and begin to develop them into a style which will work with the Sci-Fi persona^
From what I have discovered, the Sci-Fi channel hasn't really had a very varied or substantial history of 'Idents' since its inception in the UK in 1995, and the montage I created is made up from the ones I could find - one of which was from the French version!
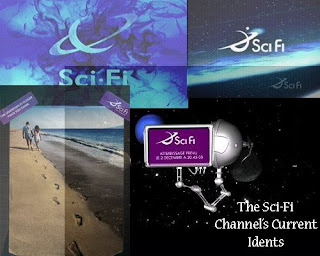 ^As it is, the titles have barely altered either, with most of the imagery focused on contemporary photography of the outer-space orientated kind and this, coupled with more stereotypical UFO and planetary imagery, means that my ideas could in fact be possible for my proposition of a single, recognisable character within certain situations...^
The Mood Boards
After much deliberation, I have decided to choose the very idea that I had originally doubted when looking at the Sci-Fi channels choice of the familiar UFOs and "Your not alone" slogans; I want to create an alien/outer-world being dressed up as an 'Average Joe' (perhaps a baseball cap with the Sci-Fi logo on it as well!) He (It!?) will be in a set of three situations involving a monotonous and typically British task of housework - purely the idea that an alien could be doing these activities would most certainly draw the viewers attention, that's for sure!!
 ^This Ident relates to a scenario in which 'Si' the alien (its easier if I use that terminology!) is washing up and the channel titles appear in the soapy water in the bowl. In order to prove his humane qualities, yes he will be wearing marigolds too!
Its difficult for me to describing any emotional or psychological detail the differences between all three, but if the whole point of the Idents is to portray the channels sense of humour, willingness to try out subjects that haven't been tested, and promote their material,then I'm willing to give it a go...^
 ^A scenario related to 'Si' doing some ironing. This one, and the third down below, will take place in his lounge, so I have the chance to create an environment which could have all different and varied accoutrement's to do with outer-space or fashion an interest in astronomy - 'Si' could well be a character interested in learning where he came from, in actually fact!
The channel titles will appear on the iron's sole-plate, still red-hot after burning a hole in his shirt, which could also have the logo on it perhaps!^
 ^And, lastly, this is where 'Si' will be dusting away (perhaps clearing the dust from his shelf of model aircraft or Rolling Stone memorabilia...!) and, either he gets dust up his nose and sneezes, the dust flying into the room and the titles appearing as the dust floats around the room/settles again, or, in fact, he is merely wiping down the shelf and the areas he has wiped shows the Sci-Fi titles against the still-dusty areas^
I have quite a few ideas to be getting on with, but rest assured I will only go with them if they are perfectly plausible as flowing animations or won't require weeks worth of work, only for them to look gravely average at the end...tune in next week to see drawn sketches of possible designs, rather than have me babble once more, that not exactly constituting a worthwhile post, if I'm honest...