Monday 30 March 2009

Week 9 - Si is placed in the First Ident!

Yes, the time has finally come for Si to be placed in his 'home' and for me to create all the necessary equipment for him to use in this first Ident - the one where he is washing up some plates and one will fall onto the floor, the one which will have the Sci-Fi channel texture on...


In order to create the sink, I would need a shape which would realistically hold water competently.
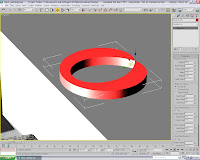
Under 'Extended_Primitives' there was the 'RingWave' option and I decided to alter some of the default settings of it to see what happened - this image shows when I specified 'no-growth' on the 'RingWave_Timing' setting and selected 'Outer_Edge_Breakup', increasing the crawl time and width flux so that the pinnacle of the shape pinched inwards as shown
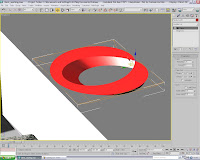
By adding the taper modifier and specifying the 'Taper_Axis' as 'Z' on the primary and 'XY' on the effect, a bowl shape has formed

At this stage, I was inherently worried that, as I had tried with a couple of the 'Extended_Primitives' before, this object may not 'Boolean' properly when I want to add on the Transparent texture for the water in the 'bowl'
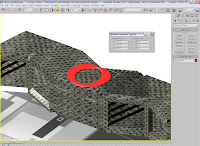


^Here, the sink is placed where it should go for the Ident to play out ( I hadn't checked whether it would 'Boolean' correctly at this point!)
Note: By Right_Clicking on the 'Move' icon, it brings up this window shown here which is primarily for when an object's location details need to be copied down^
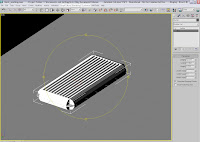

I needed a draining board for the plates to go on (well, for one of them to stay on, the 'Sci-Fi' one will slip off anyway!)
By creating a box and, making sure there were 10 width segments , applying the lattice modifier formed this object shown here

The lattice modifier generated the exact struts I wanted for a real space-age looking cutlery/utensil drainer - especially in the chrome finish...
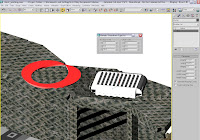
As before with the 'Move' icon, by 'Right_Clicking' the 'Rotate' icon, I can accurately adjust the individual digits on the X, Y and Z co-ordinates, as well as the shapes dimensions (by which you can see that the drainer is now shorter, but taller)

At this stage, I had also tried to Boolean the sink, but as I feared, the shape just kept taking on the properties/textures of the worktops!
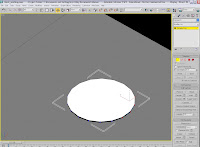

I needed to re-create a plate for which the Sci-Fi material would be placed and although I had tried positioning it before, its very temperamental in both the 'scaled_tiling' and the X,Y and Z tiling for it to be adjusted to be in the right area

The cylinder is very thin, as I wanted to be able to use the 'Bend' modifier without it inverting itself and so messing up the UVW Map application. I have selected it by the vertices shown here
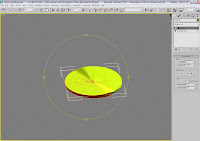

By selecting half of the cylinders vertices, I was able to apply the 'Bend' modifier to only one half of the cylinder, shown here
Bent on the 'Y' axis, at an angle of 3.5 and a direction of -122.5, the image shows how the plate looks on one side

I now need to figure out how to apply this to the other side without re-setting the figures
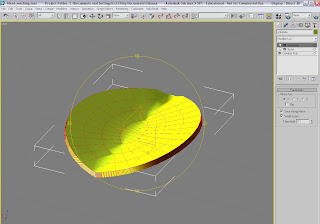

^I discovered the 'Symmetry' modifier would, when applied, be able to mirror the settings onto the other vertices for me (a welded seam with 0.1 threshold) without any hassle of adding on another 'Edit_Poly' layer into the hierarchy'
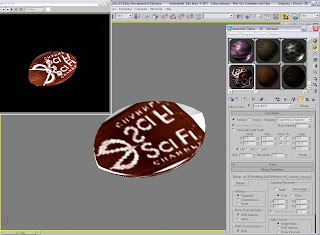

Now that the plate was finalized, I needed to adjust the Sci-Fi texture to fit the plate as well as possible

I knew there would still be some slight tiling issues (as Max's adjustments only work to two decimal places!), but I was going to consider tampering with the 'Blur_Offset' so that there would an almost double-outline of the text

Firstly, but adjusting the angle of the texture, I was able to centre the image and get a result as shown top-left (the mirrored look didn't work...)
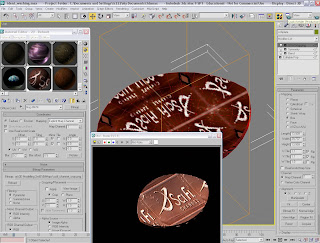

I reached this point where I became slightly confused, as the image shows. Whatever I was adjusting with the material on-screen, the rendered version didn't show anything remotely similar to whats on the scene!

So, I decided to reapply the UVW Map and carry on with the Blur(Offset) The scaled tiling needed to be mirrored for this part and with 'Blur' set at 0.2 and the 'Offset' at 0.5, I changed the textures alignment to the 'X' co-ord.

The U and V tiles were at 1.1 and needed to be 'flipped'
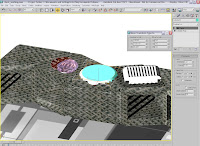


Now that I'd done away with the original sink idea, I decided to just add in a cylinder, taper it and apply the transparent material from there. All it needed was to be integrated into the worktop and have minor adjustments the 'taper' settings. Again, the 'Move Transform Type_In' window helped to make fine adjustments to the position of the sink before applying the texture
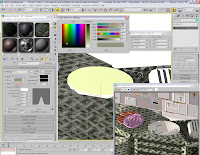

Although quite a complex process, the texture needed should take on the characteristics of water in this settings and reflect the light in the room realistically (even if Si is on the Moon...) A 'Raytraced Shadow' was selected, with the 'Phong_Shader' as a preset. Three diffuse colours were present, which I changed to the tones best suited to the kitchens natural ambiance. A bump raytrace was added, with the 'waves' preset for extra detail. The image shows the relevant windows and how it looks rendered.
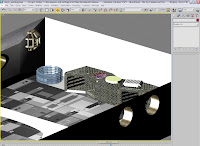

^The scene is set for Si to be 'merged' with this current set-up. I had previously tried to import him, textures and bones as well, but this caused hell and all problems later on when rendering as the bones had lost their 'skinned' settings when attached to the limbs!^
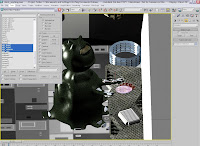

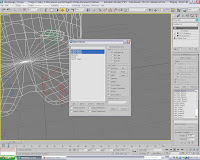
After merging Si into the scene, I discovered a tool will undoubtedly be a life-saver due to amount of bones I needed to include in order for his tentacles to move properly. The 'Selection_Floater' is just a window which you can use and, as it lists all the objects in your scene, you can then select each of them however you want. Also, notice how the reflective part of Si's lizard skin texture glistens in the lights as if its still moist
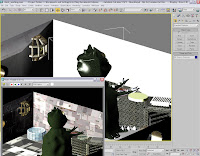

It was at this point when I realized I hadn't rendered the scene from near the ceiling to see if all the lighting and texture-application would still look presentable

As shown in the image on the right, the light in the corner throws a generous glow across the sink area, but still retains the shadows and doesn't damaged the reflective qualities of the water
Especially, the wall on which the light is attached is actually detailed where the panels have highlights along the edges too!
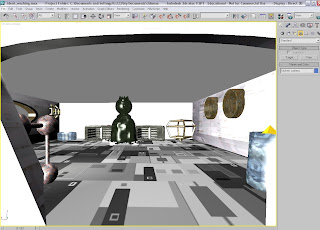

^This is actually the first static shot of what the camera will see when the Ident begins. Of course the starry-sky-textured ceiling will be brought down lower to give that complete effect too (all I need to to is slide it sideways, such is the way I've set it up) Also, below is a rendered version - I'm really impressed now that all the interior details are sorted and its just a case of animating it all now!)^
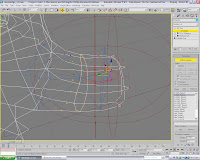
Tuesday 24 March 2009

Week 8 - Si is 're--boned'!

I decided to make sure that Si was 'skinned' and suitable 'boned' in all the right places this week, so that he could be imported into each Ident when needed, especially since I didn't need to alter him through each separate scene


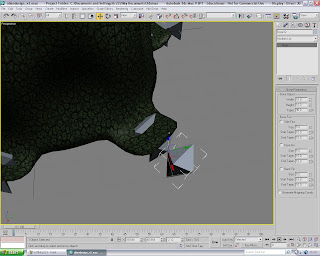
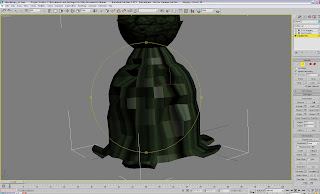
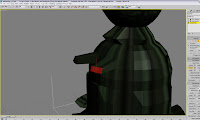
This image is an example of when I was trying to modify the existing bones that I had created the week previous.
I refer to the position Si was in in which, when I attempted to select a bone connected to the end of his flipper/tentacle, that section of his body would cave-in on itself (not the most elegant thing for an animation to include, that's for sure!)
Unfortunately, no matter what I did, this method wasn't working...


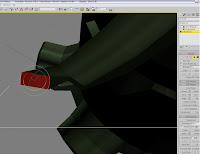
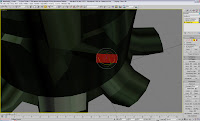
I then tried to re-size them: perhaps because the starting bone near his body was actually making contact with his body this would cause the envelope to include vertices along the side of the body in the movement!
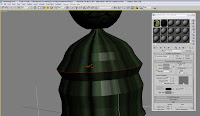
This still didn't create the desired effect and, when the window shown in the image on the left was on screen when my lecturer was there, I was told that because I had specified some of the bones to be instances of another, that meant Max was trying to move them in tandem, to which I was then advised to re-bone...

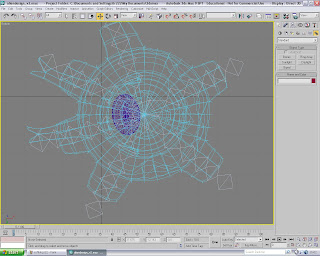
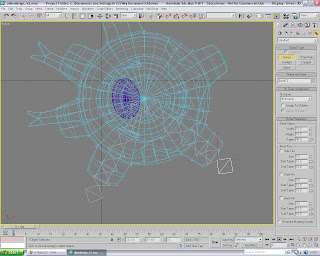
^This was the result of the 're-bone'. What I intended was to create a row of five or six bones for each tentacle from the centre of Si's body to the outer edge of a particular bone, with the 'nub' for control at the end. From a selection of the 'top' view and going into the 'wireframe' mode so that each section of the model would be visible, for me to easily judge where to put the bones in relation to each other, the bones were created and lined up as accurately as possible^

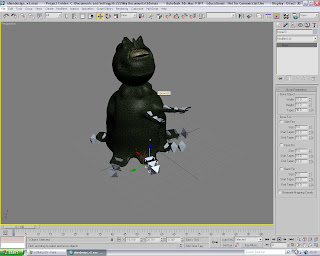
^The finished result - note I have hidden the arms bones so that I didn't get confused as to which bones were added onto the 'Edit_Envelopes' tool
The only trouble is that due to their being a set of six bones for six tentacles, there are thirty-six bones to worry about when I need to commit to future alterations!^


^After re-selecting the 'Smooth_and_Highlights' viewing mode (which then re-applies all the modifiers in the hierarchy Si had as well), I could then test whether the bones would comply
Luckily they moved as I expected them to, both with rotation and positioning, the 'nub' connected to the outer edge for subtle movement and the bone directly inside the fin moves it for use when I attach Si to the 'Automate_Path' for any movement he may have around his environment^

^The finished article - by this stage I had tested the relevant bones (and even got him to demonstrate each finger working independently!) with which he can appear ever so slightly more believable in his settings
The bones themselves were, in the process, renamed and assigned their designated positions for future reference, his hands and arms needing four separate bones in the end - upper, lower, and the two finger bones^


As I am posting this in week 9 technically, by the end of this week I would have finished all the interior furniture and lighting situations. The final touches will be made to his abode, and then the Idents begin in earnest... PS I have also gathered the background music for each Ident, as well some suitable noise effects for Si and his housework!

Tuesday 17 March 2009

Week 7 - Part 2 Let there be light...and an almost furnished house!

I continue with the creation of furniture for Si, a process which has taken a while longer than I expected it to but, by planning to furnish and decorate/light these two rooms, I have in effect, set up the scenes for all three Idents...


With no real plan in the placement of many of these items, I just began by selecting a cylinder from 'Standard_Primitives' and applying the Lattice' modifier

I have had experience with this modifier before and I like it due to the way that it takes any solid-form object into a series of 'joints' and 'struts', resulting in an object which look as though much time has been spent on it in order to get each individual strut aligned


I then returned to the cylinder and adjusted some critical statistics; 'slice on' was checked and this option allowed me to adjust the 'slice_from' and 'slice_to' tools and this separates the cylinder into two separate pieces which expand and contract in a 360degree aspect


^The 'sideboard' in position in the lounge - I had considered it for a light fitting (which, incidentally, is shown a few shots down!), but I settled on it being an object of interest for the camera to focus on during it flight around the room...^

^ This was, surprisingly, a cylinder once again, with 4 'sides', half the height segments but double the cap segments and no 'slice on' selected (this is the coffee table I have planned for Si to be cleaning when the image appears in Ident 3)^

^ This is the result of a 'clone-as-copy' of the coffee table, and again modified to within an inch of its life to get this series of three work surfaces in the kitchen, one of which will get a sink in it for the 1st Ident (this is the centre section, and the other two on either side will be rotated to show an open space: even aliens need storage space for cleaning solutions!)


I then felt that Si needed the all-important teapot in his kitchen

Although it doesn't look anything like it in the image here, this object was actually part of the 'Extended_Primitives' tools
The parameters were altered from default settings; the radius became 35 and I removed the 'handle' and 'spout'


After using the 'Taper' modifier, I then applied a 'rusted_metal' material from the library
UVW Mapping it with the 'Planar' setting enabled, I placed the 'object' into the corner of the room next to the work-surfaces and exterior window (I bet Si would use it every day if he could!)

^Another example of the 'Lattice' modifier. This time around, I created a cube and made sure that there were joints, as well as struts (hence the spikes on the outer corners of this sideboard and television stand - this is displayed further on in this post) were enabled
The extra rows of struts were created just by increasing the length and height segments^


The sliced-cylinder that appeared earlier in the post makes an appearance for this part
As the image shows, I have positioned it where it will stay in the corner of the lounge and I have also applied a 'Galvanized_Steel' texture to it (hence the purple hue)

These two images are an example of when I was trying lighting effects and positioning around the room
The two types of lights I used were 'Omni' and 'Target_Spot' for this test - I attempted to include into the stand by adding a sphere into the upper section and emitting the light source from there
The image on the right shows a rendered example of how the light throws a great deal of shadow and an even contrast throughout the room
However, I felt I needed to create a piece that was more believable...

^ The 'Lattice' modifier was used to great effect here creating, from a sphere, two suitably space-age wall lights, adorned with a rusted texture as to appear centuries old. I planned to have two light sources inside each of them, and enabling shadows so that the lattice work casts shadows on the lounge flooring^

^My idea worked - by choosing the 'Mr_Area_Omni', I created this look which almost certainly creates the sort of atmosphere I was hoping for. The atmosphere itself attempts to create a feeling of solitude on behalf on Si, made only more strenuous by the fact of the mountain of housework-related activities he must do (whether he's doing for himself or the wife, I don't really know!)

I'm determined to start animating next week, as well over Easter, so this is most definitely the last pieces of furniture and lighting I need to do - in effect, the creation of the sink area, the iron/ironing board and the feather duster/cleaning cloth are all that needed now...

Monday 16 March 2009

Week 7 - Si gain some bones for his body!

Yes, Si now has all bones inserted where they need to be:- here's how it came together

The 'bone' tool works simply in that the cursor will draw out the bones on-screen and automatically join them to one another in a line, allowing for easy positioning onto the limb/object ( this is the reason Si's arms are out dead straight; much easier and less stress when attempting to line the bones up with the required material!)
I created a set of four bones: upper arm, lower-to-wrist and the two finger bones, as he needed to appear as to handle items too

I made sure that when 'Cloning' the bones for the other arms, I used the copy option as I definitely didn't want me changing options on one arm, only for it to happen on the other unnecessarily...
At this point, I also thought it wise to get into the habit of naming the bones appropriately as, even though there were only going to be a dozen or so in total to control,I knew it would be good practice

^The bones in position, as well as the correct tags for me to refer to when applying the 'Skin' and 'Editing_Envelopes' modifiers^


The 'Edit_Envelopes modifier is an intrinsic tool by means of allowing the user to completely customize the area which would be affeced by the movement and atached solvers on any given 'bone'
By which, the oval-wireframe in the image can be shrunk or enlarged at either end (Si's fingers, for example, are tapered, so I would need to decrease the target are at one end to allow the finger adapt freely without constraints in the motion


I adjusted each bone as precisely as I could, especially given the fact that, as the image show, you can never be too careful!
The red area on Si's body shows that the envelope for that bone structure would, when connected and manipulated with any attached 'HI_Solvers', either rotate the body around or just lift in upwards or downwards (I therefore readjusted before going any further) This process was to be repeated for the other arm

NOTE: Although I hadn't gathered suitable imagery to show it, I actually applied bones on each of the tentacles/flippers too: two bones for each flipper! I also worked out a system by which I copied some as instances as some as copies so that each set of two opposing tentacles will move in unison. I also colour-coded those instances so that I knew which were which, as it were...

Si is sorted and I hope he's pleased with hows he turned out - I know I am!
In part two this week, I continue with furnishing the lounge (Changing Rooms in Space!)

Friday 6 March 2009

Week 6 - Part 2 Si gains limbs (...now a fully working mascot!)

I kept having a thoughts of what would have to be done in order to finish Si off (in the nicest sense of the word, mind!) As well as adding in the tentacle/flaps for 'feet', the arms would need to be long enough and able to be contorted and manipulated readily enough for what I was planning with housework around his home (washing up with the gloves(?), ironing and dusting a table with a cloth)

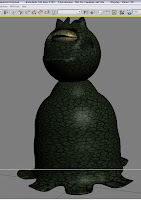
Firstly Si needed a re-shaping since I had left him last time with a not-too flattering rotund middle, and looked slightly misshapen and his overall appearance in the body wasn't what I wanted

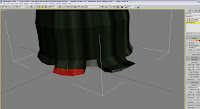
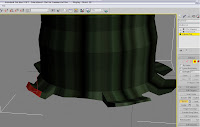
I took the decision to go into 'sub-object' level, select the 'edge' option, and began to go all around his middle and pulled the extraneous edges inwards - I just needed to slim him down for an improved appearance, especially since adding the arms later on would require the extrusion of only two elements anyway...


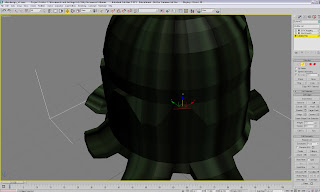
After I had adjusted as far as was needed, I returned to the base of his body, and began to extrude his tentacles outwards in two parts so that I could add the bones and HI Solvers in a way that would allowed said flaps to move up and down on a joint (giving the appearance of Si using them to support him and to pull along with)


My method was to pull out the first extrusion - this was to point upwards along the polygons plane - and using the 'rotate-object' tool, I pointed in downwards and an angle of about 200degrees
It from this end point that I then extruded outwards once again, at the angle shown in the image shown on the right
The point at which the tentacles make contact with the floor is showing a realistic, Si could move around his home with great ease


After I was happy adding the four tentacles on the front, and two on the back for stability, I then left the 'editable poly' level, and re-applied 'Mesh-Smooth' and 'UVW Mapping' this is the result
As shown, the tentacles are very much the shape I was hoping for and, even better, the UVW Map moulded exactly as I wanted too (let's hope during animation the textures stay put and not break up!)
I checked how he would look when rendered and I was very pleased with the result - now he just needed the all important 'arms' with which he could carry out his menial tasks...

^Before I began the arms however, I wanted to add some final touches to Si's body. Namely, depressions and little irregularities in his skin texture and overall form. All I needed to do was to go into 'editable-poly' level once again and select the vertices by one or two together and pull them inwards with the 'move' cursor. I tried to be symmetrical, and I kept returning to the highest modifier level to check how my adjustments were looking^

^How Si looked in the lowest modifier level - you can how the scaly texture reverts back to its base colour tines and no real tiling order without the 'UVW Map' applied. The depressions in the skin also look very basic in this view, as do the tentacles, but this is necessary in order for the user to deiced if all the modifications are correct before moving on with anything else!^

Keeping at the position of lowest level, I selected a polygon (which, incidentally, were all rectangular due to the extrusions made of the main body) and bevelled it outwards to the point you see here
Unfortunately, I first tried this as one extrusion, but was told that this meant that I'd made it difficult for animation as the bones would work on the principle of there being only one object and Si's arms wouldn't bend, only move up and down!

Thankfully, Max helpfully divided the polys into two for me as a result of me bevelling the fore-arms into delicate wrists; I planned to work from either two or three fingers anyway (as long as Si could hold something, its not like I planned for him to have flexible thumbs and double-joints!)
I then extrude the fingers outwards and, for pure simplicity, I kept the fingers as one object so that as I needed for them to do was to clamp down on the objects put into them - its not like we know how aliens would hold items that us humans have learnt to...


I actually angled the two parts inwards of each other so that it would seem as though they were made to grip items between the nubs on the end.
I was tricky getting the extruded parts to rotate, resize and move as you wanted; they didn't move like you would expect ad they have a pivotal point as cannot move from he pint as which they are extruded!

^The finished article from the front view. Note the arms which, after reapplying the 'Mesh-Smooth' and 'UVW Map' are just as realistic as a supposed aliens limbs could possibly be!^

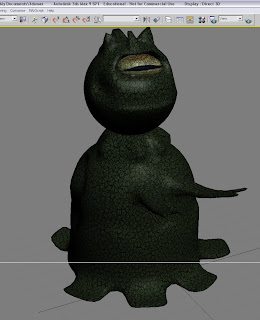
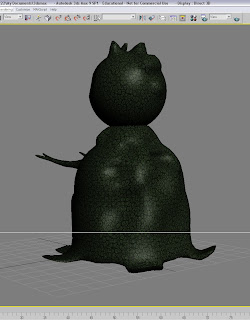
^From Si's rear. The depressions and undulations in the skin, along with the extra protrusions and horns atop his head as very noticeable, without being too extreme as to detract from the overall effect and detail of the full form^


Now that Si looks happier being fully-formed, the lounge is now planned to be furnished so animation is planned by this time next week - wish me luck!!