Thursday 30 April 2009

Here They All Are - The Sci-Fi Channel Idents!!

The whole process of sketching out ideas, designing the environment and character style, as well as gaining invaluable experience in animation ready for next year has been such an eye-opener, especially considering I hadn't even realized half of what Max could actually create and display.

Ultimately though, the frustration and frequent annoyances that came my way only served to push me into creating and refining my ideas and ingenuity onto greater levels - I hope that this shows both visually and aurally, in relation to audio choices, not forgetting the camera work and physical motion that Si delivers to emphasise my message I wanted to put across in creating these Idents; the Sci-Fi channel has a sense of humour and wit which can only be demonstrated by putting an alien living on the Moon(!), carrying out the tedious tasks that we cold only contemplate humans doing...

Here's a run-down of all 3 Idents and my experience in creating them:

IDENT 1 - WASHING UP

This Ident was actually the one I came up with first and, I felt, best conveyed the message of "Aliens do boring housework too!" When drawing out the situation first, I actually always planned for the camera to come in from the archways on all 3 as i would seem as though the viewer is actually venturing into Si's house and seeing what goes on behind closed doors (in these instances, something very laborious and tiresome...)

I had also intended the camera to focus more on Si's face had I been able to animate his mouth o move and swivel his eyes around but I was unable to do this given my lack of experience of animation and the intrinsic difficulties animated facial-movement contains!

The creation of the kitchen itself however, took a lot loner than expected. The inclusion of windows looking out onto the terrain outside was planned, but I had to develop a new approach it more than once as the technique to 'Boolean' out the area where I wanted the porthole to be was made more tricky because I wanted to use a tube, which is a default shape not recognised by Max when included in a Boolean - the other furniture and textures in the kitchen were less troublesome, although I had no clue as to how seriously the 'Translucent_Layer' for the water in the sink would affect rendering times (probably almost tripled the length of time to render each frame - around 40-50 seconds, if I remember rightly!)

IDENT 2 - IRONING

The second Ident needed to contain not only the incorporation of a new interior setting, but the creation of yet more furniture to fill it with. Again my plans were to change somewhat from what I originally considered as part of the complete motion, since I knew that all 3 needed to be within 3 or 4 seconds of each other to sit properly within televised schedules if they were to ever appear on the Sci-Fi channel itself!

The main reason I also wanted to involve so much thought into the furniture design is that not only had I found a fantastically space-age modifier ('Lattice'), but the authenticity and giving the viewer the feeling of creating a genuine setting that an alien to really be in was a definitive aspect for me to focus on keeping in tune with everything else

My decision to include a Reactor was to not only involve another aspect of Max that conveys an understanding of technical use but, by insisting upon myself to continue with a single panning camera throughout all Ident separately, I could make sure that the viewers would take notice of all areas of Si's living arrangements and appreciate the thought and attention that has been paid unduly to the interior and small examples of exterior features than eagle-eyed viewers would see at the corners of their eyes!

IDENT 3- CLEANING


The third and final Ident was intended, if the channel was to ever actually include these animations in a promotional campaign, to follow on from and be twinned with the second. The reason I say this is because as the camera enters the room, the viewers will notice the ironing board and iron pushed back towards the bookshelf that is in the corner, giving another feeling of a true habitable living quarters than Si is in (and if they were to see this third Ident before the second, they would take note that Si uses the 'board and puts it back where it belongs in it's own place every time...)

I will say that, perhaps due to selecting a HD derived resolution when rendering, the actual textures and materials used throughout the interiors and on almost all pieces of furniture are remarkably detailed and weathered in equal amounts - this was another goal of mine as part of a long list: to make sure that the viewers are aware of the age and feeling of singularity within the living quarters Si is in for an undisclosed amount of time (years, centuries, millennia!!), the metallic and industrial feeling of all the default and custom-created materials only adding to highlight this aspect

Taking the Rendered AVI's into Movie Maker & Premiere

I now had both the video-based and audio-based media to combine and enhance in the two video editing programs available to me. Having recorded background track-audio myself from a compilation Jazz-Funk CD and obtaining various ambient clips related to each Ident from www.ilovewavs.com (watery bubbles and dish rattling for the Washing Up Ident, high pressure steam for the Ironing and a cleaning-squeak sound for the Cleaning Ident...), I decided to experiment to see if the background music could be normalized in Premiere at the stages when the sound effects initiated, and resume to a normal level when they weren't being used.

The backing tracks themselves were chosen based on their ability to emulate the synthed sounds and strong, bass-driven undertones of many traditional sci-fi and space-age programs shown through the years. I also felt that the timing of the score and beat inherent in the tracks were prefectly fitting in with the sweeping, panning camera in the Idents themselves

Before I describe that, I first had a few issues with rendering the Ironing and Cleaning Idents...


I knew that the inclusion of a translucent/reflective material on any object in the scene would cause rendering to slow right down, but at only just over 300 frames, the Ironing Ident took a lot longer than was predicted
It was made worse by the fact that the television was always in shot and so I couldn't use the technique of rendering the frames where it appears and then 'Hide Selection' on it, and then continue with the other 100 or so frames

This technique thankfully, was applicable to the third Ident as the camera sweeps past the TV after frame 180
Although not lasting near as long as the three hours spent waiting for 'Ironing', the sheer size of the file and UVW Map meant that as the table top came into view, the rendering slowed right down

I made sure to use 1280 x 720 resolution to get the best from Max ( I had previously tried the 'HD_Output' size selector, but the AVI resulted in a file of 1.2GB!)

Opening up Windows Movie Maker, I imported the 'identone_washingup' AVI file, as well as the WAV files 'backing_track', 'dishesrattling' and 'plops1'
I then dragged the AVI file and the backing track WAV onto the Storyboard. I had to crop the beginning of the track to fit into the 14 seconds worth of video and then attempted to drag the other two WAV files onto the board too -I found that I couldn't combine them with the backing track, only place them before or after it
Unfortunately, I discovered Movie Maker only allows a single audio track at once - I would retain this info as a potential advantage to me...


Content with the backing track only, I then chose 'Save To My Computer' from which M.M brought up a window which displayed a multitude of options for video, each with varying levels of file sizes and resolution quality
As I had set 25fps on all my Max animations along the timeline, subsequently defaulted as PAL, when I originally exported the AVI from Max I knew I was to stick with this settings in both Premiere and Movie Maker

^The Ironing Ident actually needed two renders in the end as I found that the last 30 frames where the camera is above the 'board and spins round to look at the shirt, their was no footage exported! The last part of the end of this timeline actually shows the extra rendering I needed to do, not forgetting how precise I needed to be to stitch the excess footage onto the original, video and audio combined...^


Although I was perfectly happy with how the video quality and the inclusion of just the backing track to accompany it turned out, I kept having a nagging thought about my selection of sound clips that I'd collected on the basis that I'd use them in conjunction with the backing track
The image here shows how, in Premiere now, I had the opportunity to make use of four audio channels, the technique of 'normalizing' each separate channel, to raise and lower the volume of the relevant audio clips placed on the channel

Using the 'Razor' tool, I was able to target certain key-timeframes throughout the backing track that, when conflicting with the sound clip ('dishesrattling', for example), I could then make a cut at the start and end of that clip. I repeated this method for twice again for the 'plops1' effect when the plates are in the water
The sections of the backing track now 'cut' could be moved to the second audio channel - the effects were on the third - and these two channels were normalized to -2 and -1 respectively
This meant that the backing track would remain at a constant volume until an effect would play: the track's volume would drop and subsequently raise to the set volume again after the effect had played along the timeline

^The image above demonstrates my technique described in the previous paragraph. Note how Premiere automatically recognises separate clips and buffers them right up to the next clip in the timeline, thus reducing any overlap or pauses in the soundtrack - also shown is the 'clip-gain' window where I 'normalized' the audio in keeping with the ambiance of the animation^

^This is an example as to why I ultimately ended up reverting back to using the backing track only in Movie Maker. The tempo and note-choices inherent in all three backing tracks mean that, even though the sound clips sounded fitting in isolation, when combined in the timeline in Premiere, it just didn't work. The decision was also backed by opinions given to me by others who felt that the visual animation and track are so well scripted together, to dilute that track and distract the viewer with a misplaced sound effect just for 'effect' didn't sit right and spoilt the sense of serenity and cohesion with the animation itself^

^Here was where Premiere really feel short for me. Even though I chose to input the exact(!) 'resolution settings', 'frame rate' and 'pixel aspect' as I had been successful with in Movie Maker, as shown here, the resultant video quality that Premiere delivered just wasn't up to standard for me to use. Yes, the inclusions of the effects altered the feel of the video (as I have described in the previous paragraph), but I was looking for video quality that matched the audio clarity and expanse - Movie Maker was the program I considered to match this expectancy^

Finally, after much deliberation and concentration with timings,renderings and outputs, the Idents were completed. The final post shall detail, as I did at the end of the first Semester, all the positive and negative points of the animations as a whole: due to them being only markedly different in content, but still keeping the same location, lighting, characters...Idents, as a part of their nature, will always be broadcast by a company as a group of three or four, and only differ in settings and perceived atmosphere anyways...

Thursday 16 April 2009

Week 12 - The 3rd and Final Ident

This has been planned to last around 8-10 seconds, focusing on a panning camera yet again, swooping past the television with its transparent/reflective material applied and then hovering over Si until he moves away to reveal a polished table with the Sci-Fi logo on the surface: Heres how it developed...

^Before I began positioning Si and laying out the camera path (that it was to follow in the scene), I moved the ironing board to one side to allow Si to approach the table from the centre of the room - plus, it would work from a commercial perspective that a viewer would see the 'board and go "Hey, that's the ironing board from that other Ident and its still in his lounge!" thus appealing to the sense of normality in this otherwise surreal bunch of scenes^

As I had done with the two Idents before this, I made use of the original camera path I'd created for the kitchen scene.
As I adjusted/deleted vertices that were and weren't needed, I decided that for the last part where the camera pans up towards Si (as he turns to move away from the table), I could use the 'create_line' tool and add onto the end of the last vertex of the path


I then moved the path and the lounge_camera into the area where the camera would follow from the archway, past the 'board and the television and then above the table itself
By doing this, the path could be manipulated in such a way that I could add in 'Set_Keys' as waypoints for the camera to know when to rotate or even slow up its movement along the path

^Re-positioning the camera entry-path to a few feet from the archway, I then discovered that by altering the cameras focal length and field-of-view figures, the image seen by the lens would seem to stretch or contort depending on the settings chosen - as if going from a wide-angle lens of 25mm to telephoto zoom of around 150mm^

Using the 'Constrain_Path' used for the first two Idents once again, I knew that all I needed to do was to position the path from where I wanted him to begin moving (using a similar fashion as in Ident 1 where he is moving along the path, with flippers moving in synchrony)
The end of the path would be to position Si just close enough to the table

A quick render of the scene from an exterior view. This view wouldn't be shown during the Ident, however I just wanted to make sure that the lighting arrangements would work for when the camera does reach this corner of the room and the Field-of -View doesn't get burned out by the intensity of the lights or equally, isn't so dark that the logo is clearly seen on the tables surface!


What I had planned for the table was to apply the Sci-Fi logo
on just one little section of the surface - it was divided into four sectors after the 'Lattice' modifier was applied a few weeks before

Applying an 'Edit_Poly' modifier meant that I could select 'elements' of the lattice work as shown in this image of the left

After selecting all 3200(!) polygons, I then planned that, by using the 'Multi_Sub_Object' standard in the Material Editor, I could give this selected area the ID of 2 and then specify that value in the 'Sub_Object' menu
Unfortunately, I couldn't apply a further 'UVW Map' on this highlighted area and the image below shows what happened


^When the material is applied to the area, the previous 'Galvanised_Steel' texture is erased and all I'm left with is a logo that cannot be re-positioned and will remain halfway off the surface'

^I also tried removing the lattice texture completely and then applying a 'UVW Map' that would then position the logo texture as I wanted with the 'GIZMO', but the tiling just wouldn't sort itself out and I was left with the render shown here^

The last solution was to create a plane, convert it to an 'editable_poly' and extrude it by only a few units, so that it wouldn't be so obvious (a similar technique I used to make the t-shirt lie properly in the ironing scene!)
Also, I made sure that , for added realism the texture was also semi-integrated into the lattice texture of the table by lowering the plane until it was breaking the structure of the table, as shown


After that, I then could apply the 'UVW Map' to the plane, treating it as a separate entity from the table, and use the 'GIZMO' to rotate the re-position the texture. double checking how it was looking every time I moved it - this was the result

The 'Bump_Map' that had previously worked with the t-shirt so well didn't look right here, so I decreased the value of 'Bump' from 250 to 100

^As per usual, the basic scene view doesn't give me any indication whatsoever that the tilings and mappings applied as actually recognised by the 'UVW_Map' The difference is marked, as you can see by the rendered and un-rendered versions
Note: I have also used the 'GIZMO' to rotate the texture to face the camera as it hovers over the head of Si when the last few frames are played out...^

The next step was to incorporate another path for Si to begin his movement across the lounge towards the table. Through the initial 120 frames of the animation, Si would slide along the path and begin his scripted movement that involves him moving along the table left and right, as I tried to subsequently block the camera, as if portraying Si to be vindictive and irritated at having to do this menial task!

As from a similar method used in the other two Idents, to give the impression as though Si is using the flippers as means of pushing himself along the floor, I wanted to use 'Set_Keys' and rotate the flippers on the interior 'pivot point' as they moved from rest to active, set up along the timeline


Completing the looped movement of the flippers ( with the help of the Dope Sheet ), I then managed to get Si next to the table


By this stage during the animation the camera will just be turning around to face Si after facing the lit wall opposite him


As the image shows, I would need to alter his position due to his extruded limbs coming into contact with the table somewhat!


I then wanted to move Si around the table, keeping his back to the camera at all times


I figured that I could 'clone' the path he is already on and then alter the 'Path_Constraint' with the 'Auto-Key' on so that he could then use this path for the motion around the table


The green line nearest the camera is this new path (kept straight to avoid any unnecessary changes to his co-ordinates in relation to the interior space...)
^One more, I needed to make sure that the flippers would be reacting to Si's changes in direction and motion. The simple process of rotating them upwards and downwards by slight increments every 20 frames justifies the repetition of this process ^


The Dope Sheet became an invaluable tool when making the adjustments to not only the flippers, but the rotation of the arms as, due to my design decisions and lack of experience in 'boning', I was able to use only the two finger bones and wrist in rotation, and not the upper arm bone as this caused the limb to cave in towards the body

The curves displayed on here also alerted me when I set keys for movement that caused irregular or disjointed actions as a result


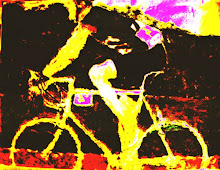
^As the image above shows, I have tried to time all of Si's movement within the panning motion of the camera so that I can achieve the effect I'm aiming for Note at this point, the actions will include Si waving his arms over the tables surface and the inclusion of a suitable sound effect will contribute to the 'cleaning' the surface action (I was to involve the Reactor again, but the trouble I have had integrating it into the timeline during the Ironing Ident meant I wouldn't attempt it again for this final Ident)^


The final section of the Ident was to involve Si moving away from the table and sliding away back towards the kitchen
As the image shows, the camera has been positioned at just the right moment when it begins to rise and position itself across the table and sweep around during the last frames

Repeating the process of animating Si's flippers was simple enough too( although the camera wouldn't be looking at Si anyway)


As it has seemed with the Sci-Fi logo texture through all the Idents, the un-rendered screen image doesn't show nowhere-near a true visual representation of the rendered material

This meant that positioning the camera proved slightly more tricky as I couldn't gauge where the lens would be aimed to fully display the logo for a decent length of time...


However disruptive and repetitious it was in practice in order to retain an accurate image, I had to alternate between the 'l_camera' view and 'Perspective' view

I was impressed however, with Max's ability to almost second-guess the adjustments and timing of 'Auto_Keys' prompted by the user to judge when and where the camera's F.O.V would place itself - apply the key to a certain frame and then a key 20 frames later allowed smooth travel throughout


Not all the designated keys where, in fact, as accurate as I had thought. Returning to 'l_camera' view once more, I got a surprise when I found that there were a series of jerky and discordant movements along the camera path

I was hesitant to use the Dope Sheet in this instance as I knew that, while the sheet helps in co-ordinated terms with axis, perhaps it wouldn't fix the motion-based glitches I discovered

^The sheet, typically, revealed that there were indeed small discrepancies in the path, showing up as sudden changes in elevation or horizontal movement along all three axis. I smoothed out all the areas I felt were going to cause constant irritation and tried the animation again.^

^Deciding that it wasn't going to be improved on much more, I moved the ceiling into position - which, incidentally, needed to slide across when the camera would approach Si as to avoid 'empty space' above) - and a background texture (shown to the left of the image) placed onto a plane giving the impression of an outside environment, again needing to be moved as the camera pitched and rolled along the path!^

All that was needed now was a quick check of the Rendering menu - selecting a 'Custom' output size of 1200 x 800 also - and a rendered AVI is the reuslt ready to be edited in Primeire - this will the last stage for all three Idents, as the audio is ready to be inserted too (all relevant sound effects and ambient audio clips included...)

Wednesday 8 April 2009

Week 11 - Ident 2 'The Ironing 'Begins...

Now that the first Ident is metaphorically packed away and ready to be edited with audio in Premiere, I can move onto the second Ident. I planned to use the Reactor as an example of a less than usual use for it: Si will be ironing his t-shirt (which is partially hanging over the edge of the 'board) which will (hopefully) react tot he iron's weight and his force on the t-shirt by crinkling up and shifting on top of the board in a semi-realistic fashion - thats the plan anyway...

To begin the set-up for this Ident, having already organized the ironing board and iron's physics the week previous, all I needed to do was to bring Si into the Lounge from the Kitchen area (grouping all his limbs and bones into 'alien_complete' was a great idea at least)
The green line in front of Si shows the new 'path_constraint' that I added for him to be following towards the position of the 'board

Happy with the frames that Si will move in to begin the action of ironing, I brought in the ironing equipment and re-sized it to a scale that would make sure that Si's arms wouldn't be able to reach too far upwards or downwards and risk causing problems with the skin modifier
All that would be needed was for his arms to carry out a smooth motion of back and forth along the t-shirt(as the image shows,the body properties are also in place)


Having arranged the items that would be in the scene to the positions where I wanted them, I then adjusted the view in 'Perspective' to get an idea of where the camera would be relative to the height and room-position using the slow zoom inwards towards Si. To the right of the image, the outside of the model is visible, showing up black in the render - I needed to fill that 'dead-space'

I decided to mirror the method I had used for the other view out of the kitchen window: find the ideal image (in this case, a moon- landing image with the rover in the mid-ground and hills further back...) and apply this to an 'Elevated_Plane', adjusting the rotational angle backwards slightly to compensate for perspective and then, to get the effect of solid floor, 'clone' this and then lay the plane flat and join up the texture with the original (tiling may need adjustment too to get the materials connected)

^Here is a rendered representation of the camera view as shown in the second previous image.
Note the outside now has the decent scenic view that the camera will hold as it pans towards Si^


For the lounge's camera path, I thought it most efficient to 'clone' the original kitchen path and alter the vertices to fit in with the planned route around the lounge
By keeping the 'Vertex_Type' as 'linear', I was able to move vertex simultaneously, thus keeping a smooth path for the camera for follow without any sudden alterations

Fixing the Sci-Fi material on the t-shirt meant reapplying the texture. I had to modify the angle of the texture and reduce the U and V tiling for it to centre (incidentally, the un-rendered image here bears no resemblance to the rendered image!)

Using the 'Cropping/Placement' tool, I removed any excess background to the side and above the lettering, necessary to produce the next image below

^The final stages of the camera's path will show this image here. Notice how, having altered the tiling and placement, the material has applied in such a way that the creases at the arms are apparent alongside the text of the logo itself^


Unknown to me, the reactor tool under 'Utilities' needed to be set as to begin the timing for the animation to begin from starting at frame 1 and ending at frame 300 - the length of the Ident

I needed to make sure the whole item was set up because once Max had begun 'Create_Animation', there was no option to undo
The image here shows how the shirt hangs over the edge of the 'board exactly as I had set it up to


The situation meant that constraints I had come across in the design of Si and the subsequent arrangement of his bones and furniture in his home would now cause a few issues that I would have to work around

The main problem that I could account for was that the timing of the iron's rising, falling and general motion around the table was confined to the ultimate reach of Si's arms, as shown in this image

Experimenting slightly before confirming any definite decisions, I found that the majority of the positioning of the arms and relative actions on the iron would come from rotating and elevating the bones situated on the fingers

An action I wasn't prepared for and certainly caused a little frustration when attempting to select said bones in the midst of all the other objects that I couldn't lock either (this would mean hiding and unhiding each unselected item by name!)


I did cringe a handful of times when assessing how Si's body material would contort itself to cope with the manoeuvres taking place with his arms and fingers

I had planned a basic set-piece whereby the iron would be picked up, shifted to the second arm, pushed away and brought towards Si again, only to then be placed onto its rear end as the camera would sweep over the 'board and reveal the logo on the shirt...

^This close-up shows how, as each movement was placed onto the fingers, extra attention needed to be paid to the state of the resultant distortion to the 'skin' and potential unrepairable damaged caused by a mis-click which then found its way into the final animation without notice
Making each grip onto the objects and how that would cause them to react was also tough to keep constant throughout this process^

^It was within the final frames of the ironing session that I decided to figure out if, after all this work, there was the chance an unexplainable error could cause the Reactor to detect a 'Collision' with the iron and shirt (this has happened before, bearing in mind!), rendering the animation unusable: fortunately, the use of the 'Preview_Animation' button showed me that there were no errors to speak of^


Disconcerting though it was, I had to leave the object-based side of the animation alone to make time for the camera set-up
As with the washing up Ident and what I had planned for the cleaning Ident likewise, the camera would begin at the archway into the lounge and sweep around the room, making sure to take in all the space-age furniture that had so many weeks spent on it for sheer originality, and then slowly pan towards Si
This image shows that exact point in the animation, around 200 frames in

The section here where the camera advances towards the ironing board and where Si is standing was important in so much as timing the camera travel and position had been to as exact as I could manage in relation to the movement that was continuing at the 'board

Also of note was the view out of the entrance archway where I attempted to maintain similar use of exterior features as had been used for the 'Washing-Up Ident', the 'moon-landing' shot capturing the Sci-Fi detail and persona of the channel in a nutshell perhaps...

^I'll admit that I was apprehensive to use the Dope Sheet when altering the camera's movements, purely based on the concept that there would be every chance the four tracks and relative curves could be mistimed to the keys that have been set and perhaps caused a whole lot of trouble, meaning I would end up doing all the adjustments manually anyway. Using it, there was no trouble at all - I saw the points at which there was a sudden dip or peak in the motion and gradually evened them all out without a hint of frustration^

^The last 20 frames involved rotating the camera to reveal the Sci-Fi logo facing Si.
I did discover that, by leaving on 'Auto_Key', any adjustments made to the vertices's of the 'Camera_path' by elevating or lengthening it would actually change form as the animation progress, effectively giving the camera the ability to follow an advancing path without any constraints with a path being too short or not focusing on the necessary area^

^Before I felt like leaving this alone to move onto the third animation, I wanted to explore an idea. Because the shirt and iron are in view of the camera's lens when the clip starts and so are dropped into place by the Reactor in frame one in full view, I tried to rotate the camera's opening shot to reduce the reactor appearing so suddenly in the viewers sight. As the image shows, I would have to expose far too much of the exterior walls, effectively destroying the illusion of the exterior scenes created by myself to present the view of Si being on the moon and on a planet in space! ^

Happy as I am to be finished with two Idents, I will have doubts about all three involving timings as too fast or slow, which I can hopefully rectify in Premiere which allows me to alter the speed/duration (by a percentage scale), which could then mean I will achieve my targets timescales of between 10 and 15 seconds, thereby including all music and sound effects without having to cut them too short or extend them otherwise...