Friday 27 February 2009

Week 5 - Part 3 Portholes & Scenery (plus a Tutorial on Havok)

The tutorial will follow my update of how the kitchen is coming along and, as the title suggests, the developments do involve portholes looking outside onto the barren wasteland of the Moon (if you haven't guessed, yes he is living in Outer Space, hence the reasoning behind my decisions for some of the obscure styling of most of the furniture so far!)

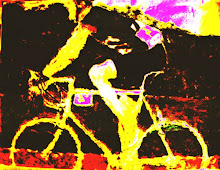
^Creating the beginnings of the portholes meant creating tubes first of all. Of course, I need to select not only the outer edge dimensions, but also the depth at which the tube's inner circumference/diameter would reach. Once I had chosen this, it was a case of rotating them to lay flush against the side wall of the kitchen interior (these were just going to be for decoration, but the idea to use them as windows was suggested to myself, for which I was grateful for the input!)^

Note: I already found an ideal texture in Max's default library for the tubes. As you can see in this image, it gives them a definite feel of aged ironmongery in a space-age environment!

I then added a 'UVW Map' onto the original and the cloned tube - both aptly named pipe01 and pipe02. The face mapping proved effective, and I also took this chance to increase the number of sides to smooth out the form of the pipe so as to appear less angular around the edges!

I then set the pipes up against the wall and slowly merged them inside to cover the interior depth. I then knew I had to create
another set of two tubes for the Boolean modifier - these were based on the measurements of the pipes already set-up, but with a decrease in the overall diameter so they could fit inside pipes 01 and 02

As the image shows, all that was needed was too decrease in the interior circumference to 0 to achieve a solid object to use as Operand B


The image shows that by making the inner tube fit inside the outer one as equally as possible and cloning it, if the cloned version of, for example, pipe 01 is the same dimensions too, then all would be well for an accurate Boolean.

With the wall as Operand A and by subtracting a material from B,
a tidy Boolean was achieved as shown the the second image

Although, initially I had a bit of trouble as the inner tube stayed where it was and kept taking on the material used in the wall, the wall which disappeared (I then found out I had 'Subtraction of B from A' checked and 'Move' instead of 'Instance' - a simple mistake I was told!)


^A view inside the kitchen from the new porthole windows...just to prove it worked!^

^ A rendered update on the interiors - not too shabby I don't think (as an idea, instead of a roof, I may just construct a horizontal plane a couple of steps above the ceiling's upper edges and cover it with a starry-like texture)^


A porthole was intended for the opposite wall which would be looking out onto the Moon's surface and the Earth in the far distance (an image which I will present further down in this post...)
The process that was used in the making of the other two is repated here, with a tube generated and staeched alog its 'x' axis so that it transformed into the shape shown to the left

Again, another cloned version was created to fill in the gap between the shape (a little more difficult this time due to the irregularity's of the form!)

But after learning what I had done wrong the first time I tried it, the Boolean was completed ahead of time and all that was needed was minor adjustments to the dimensions of the porthole to fill in the gap nicely

I also made small tiling adjustments to the material and increased the sides of the tube for a smoother look


^ After importing the image I had saved into the Library, I knew I would need to alter the tilings and perhaps use the 'Rotate_Mapping_Co-ordinates' tool, which meant I could tip it to one side and make it seem that Si's house would be following the curvature of the planet itself^

^I also tried to display the texture as an environment map, but I found its not possible to edit it in terms of repositioning, which was a shame as it was very believable if the camera was angled correctly during the rendering process. Here it is displayed outside as you should see it during the render, but I may need some external lighting to show it against the internal lights...^

Tutorial on Havok Engine


^ The first step is to create a plane and angle it downwards. Then add, on one end and just hanging over the edge of the plane, whichever objects you want to have topple over. Then create a ball which will contain the relevant mass figure that can knock them down!
After this, go to the Reactor menu and select 'create rigid-body collection' and highlight all the objects in the scene that you will include in this test...^

^Before you move on to the next part, go to the reactor menu and select 'Rigid-Body Properties' By then selecting the plane and making sure its 'simulation geometry' is checked as 'Concave-Mesh', the plane will actually suspend any objects above it (not doing this means all the objects sitting above it will fall through immediately as the animation runs!^

^The menu is displayed in the image here. You can actually selected any image in the scene and its individual settings will update in the menu
This allows to batch-select items which you want to have identical properties e.g. the pyramids in the scene here which, incidentally, you must make sure are not bisecting either each other or plane itself^

^The last step before a preview animation takes place is to finalize the settings for the sphere. By increasing the default settings for the mass to 50 points and the 'simulation geometry' to 'Bounding-Sphere', the ball will now react as you would expect in reality (the Havok engine accurately recreates real-world physics in a computer-generated motion sequence!)
Once the test is successful, you can then feel free to alter many other settings such as 'friction', which denotes the resultant force that acts on objects in real-life which have irregular groups of atoms at the surface and 'elasticity', the measure by which the object's opposing forces engage once it has come into contact with another object^

^The screen you see once you have selected 'preview animation'
You may get errors occurring, with many differing causes; from a simple thing such as an object bisecting another as we discussed, or to something more complex such as a misuse of an objects properties, perhaps using numbers far in excess of the program's capabilities!^

^Once you have a simple animation working, you can then experiment with set-ups such as this slightly precarious situation. The actual 'rigid-body' symbol shown below the ball doesn't actually have to permanently attached with the ball, as all it does is show there is a 'rigid-body' object in the scene, and all you do is select it and it will show its twinned object^


The Idents are coming together nicely, and I'm certain about what they will all involve. Next week I can finished Si's design and try a few tentative steps of animation on his arms and tentacles - should be a interesting learning curve!

Thursday 26 February 2009

Week 5 - Part 2 Si gains a lounge (and proper appliances!)

Now was the time to consider the dimensions of the lounge, especially since I would create both environments in the one file - and the copy the relevant version of Si's animation sequence into the scenes! The camera needs to be able to move freely, but not highlight the rooms appearing too disjointed with spacing for furniture and other interior features...


In order for me to advance quickly with the aim of this week, I was intending to create a new set of walls, but this would cause alot of alignment headaches.
So this image is a result of a 'copy' clone, with which I renamed as 'lougeenterance' for easier reference later on.
I was pleased at how the distance from the two would defiantly work with the camera path I was intending to create for the intro into each.


I realized that I would need to resize the rooms for one last time, especially given the dimensions of Si as I designed him.
In the image I had selected all four walls and the floor and resized from the centre of the tool, so that they would increased dimensions equally (although, I feel now I could heighten the ceilings a bit more for extra usability!)
Also shown are the light sources I have used to demonstrate the interior lights that will be reflecting around the room off many surfaces


^He is one of my proposed images which will be placed onto a vertically aligned plane to display outside the interiors. The idea of Si's home being on the moon, with outer space images all around will very much add to the feel of the Sci-Fi concept^


^With a bit of adjustments of the U and V tilings, I was able to take this diamond-stamped material and include it as the lounge floor texture. Using 'Pyramidal' filtering and increasing the 'bump' attribute, it gave this material great depth and reflective properties, as shown below^


Appliances and furniture were about to be made at this point and I didn't really have an idea of what I was aiming for - geometric shapes or anything slightly quirky was really the name of the game if I'm honest!
And so I began with a rectangular box and positioned it along the back wall just off from the entrance to the kitchen
In the image, the material editor also shows the 'brushed_metal' texture being prepped for use


I then discovered the 'lattice' modifier
I hadn't thought of using it in this context but as soon as I saw what I did to the simple rectangle, an idea of how I could work this oddity to my favour began to emerge


However, it looked almost too obvious in this setting so I experimented and found that by adjusting the segments of the struts and joints, they became more rounded and usable in a material context

Now I just needed a texture equally as offbeat...


^I felt strongly against using a 'UVW Map' on this object for fear of it all going wrong when rendering, so I tried to alter the tiling respective of how it appeared on the joints more so than the struts - the 'rusted_steel' material was more than ideal for this purpose!^


The 'object' needed a surface (it was to be a work surface for him after all!) and I thought to go with a basic slim rectangle placed over the top in between the four joints and not worry to much about it!
(I had thought the image in to the left made the whole thing look like an operating table really, but still..)


I therefore tried a texture to improve things, the 'galvanised_steel' shown here, but no matter how much alteration there was with the tilings and even a 'UVW Map' couldn't change my mind

I was to then return to the object's sub-object level to pick away at the polys and vertex to create a surface from the shapes own form


After I had applied the 'Mesh_Smooth' modifier to increase its gradual-rusting properties, I descended into sub-object level.
Having used 'Quad-Ouput' as the subdivision method, then I moved onto local control and, from there, selected edges of the object.
I could now see the individual edges of the struts and began to CTRL and left-click the edges I wanted to select

Once I had chosen the majority of the upper section of the near-side strut, I pulled it across, making sure I was sticking to the 'y' co-ordinate, so that this strut were to merge with its opposing strut
Once I had reached the other side (the rusted texture keeping its integrity thankfully!) I decided it needed a little something else...

^Using much the same technique as with the struts, I selected the four central edges of the opposing strut and pulled then upwards on the 'z' axis to get this splash-back addition^


Having found the 'melt' mod. a little earlier on, I thought about using it for another piece of space-age furniture in the kitchen; a snazzy looking waste bin (hey, even aliens have things they want to throw out!)

I created a cylinder and applied the modifier: a melt amount of
120 points, spread % of 7 and jelly-like solidity (0.4)
This sucked the inside of the cylinder inwards and gave the base a slight outwards splay - similar o what I have experienced with the mod before.

The 'Galvanised_Steel' material I previously tried with the worktop was therefore used here (I will be chucking in some geometric objects to act as pieces of rubbish inside the bin!)


^Once I was happy with the bin's dimensions, I re-modified it by applying a 'Edit Poly' modifier, which then allowed me to alter the vertices, edges and polygons as I would have done when I first converted it. Checking the 'Ignore Backfacing' option, so I wouldn't unknowingly select an opposing edge, I began to select, in groups of three, edges which I then pulled inwards to create this very raw, industrial look (an experiment which paid off I must add!)^

In part 3, I shall post details of portal windows and, my new best friend, the Boolean tool...


Monday 23 February 2009

Week 4 - Part 2 Si's kitchen gets a makeover!

Whatever I may say, I do quite enjoy designing furniture and adding textures onto walls...in 3DS Max anyways! This post also includes the structural changes I made to the previously bland four-walled-no-window-or-opening themed kitchen (its an archway for the moment!)

The interior of the Death Star in Star Wars may spring to mind, but this is close to what I had imagined in the first place (to this, I will also be adding a window looking out onto a view of Earth from the Moon - the famous one where you just the edge of the Moons cratered surface at the bottom of the image!)


The Kitchen


A couple of weeks ago while I was getting to grips with controlling camera paths and constants, I came across a small number of textures with which I created my Space Room with the teapot inside (theres a video a few posts back)
Well, I thought to make use of these materials again as they perfectly suited my actual assignment now, which I didn't plan for surprisingly...
Under the 'Mtl Editor', I re-discovered a texture ('Specular Level Map #43) I previously used on the 'pot itself, but now it was a candidate for the flooring in the kitchen; the alternation between varying shades of grey geometric shapes really grabbed my attention!

^ The texture now applied, I could alter the maps characteristics for that polished look! The map was applied to the 'Specular Level', Glossiness' and 'Reflection' channels, all at 100% The enlarged sphere in the floating window allowed me to see my subtle alterations easier^

^This is the kitchen floor rendered - note the ideal amount of reflective detail from anything that may be standing directly on its surface^


I then returned to designing the archways that would connect the two rooms without unnecessary doors and making sure they open within the animation (too much hassle!)
I began the process by choosing 'arc' under the splines tab, and then pulled out the shape you see to the right...
It was, of course, too circular in appearance, and so I needed to pull up the center in order to truly form an archway to fit the walls correctly.

Therefore, I selected the re-size tool from the upper menu and
re-formed it into the shape on the right.

I was then needing to, in order for 3DS Max to recognise it as a proprietary object ready to be used in the 'Boolean' procedure I had planned, 'lathe' it into a smooth cone so that the 'arc' will still keep all its original dimensions
Although, I had no idea to what the shape would end up as let alone on what lateral direction I was to 'lathe' it in...


^The resulting shape/form when the 'arc' is lathed in the 'z' axis. I thought this would be the ideal shape for 'Boolean-ing' out an archway, but Max just wouldn't recognize it as a constant object on screen and, as the image shows, I tried a few options before I decided not to continue^


The only other possible way that I knew of was to add a cone onto the stage, creating it 'from center'. I adjusted the dimensions that that it would work much along that same lines as my previous lathed arc, but this time I made sure the shape had enough depth to completely transcend both sides of the wall's depth.

Once all three aspects of the cone were constructed, I could then set about altering the default settings; adding extra sides and height segments, as well as 'smoothing' the whole form.

I made small adjustments to the height, mainly because it needed to avoid cutting into the floor, but also not coming into the contact with the walls uppers section, thus making the wall look far too brittle or unworkable for future reference (see below)


^The position in which I placed said cone in between both wall surfaces. Making sure rear wall was selected, I then went to 'compound objects' selected 'Boolean', picked 'OperandB' as cone01 and then 'extracted Operand' as an instance, subtracting A from B
Below is the result - note how the wall takes on the form of the preexisting cone all on sides, and how the side walls are almost bevelled due to the angle I made the cone from^


Now I was finished with the basic spatial area in the kitchen, my thoughts turned to the decoration.
I was lucky enough to rediscover the texture I talked about using for my previous camera-path tutorial scene, in which an individual in the class remarked on it looking like "the interior of the Death Star", which I was surprised to hear at that time, but now I think about it, its seems to fit this brief to a tee.


Due to the wall having so many angles on which a basic texture-application could look very untidy, I knew that best way was to ensure a 'UWV Map' was applied as soon as I had re-configured the texture to the use I intended for it in this context.

As the images on the left show, the tiling of the default material needed to be tweaked in such a way as to appear natural and no too artificial. I was pleased wit the outcome (especially when increasing certain attributes only enhances the metallic properties of this material!)

^Here is a slightly remodeled archway, which was adjusted by taking the wall in 'Sub-Object' level and adjusting the vertexes so that it smoothly curved over (reminded me of a doorway from Star Trek: Next Generation for some reason!). In the scene, you can see the beginnings the of the camera path that I had began experimenting with during this stage!
Below is the wall with the 'android texture' (as I call it) added and its seemed to apply just as well with the box mapping as it has with the other walls...^


Next post will focus on the addition of the lounge area, and the start of the kitchen furniture, which will of course be suitably quirky and certainly space-age enough!

Week 4 (technically, but carrys on from last weeks work!) Creation of the interiors...

Of course, every alien needs a home, and what better way to make an alien feel at home then to have one created for him, all with the aid of a few metallic and space-age materials within Max's library...

Oh yes, and heres the second storyboard for the second Ident (the ironing needs to be done on this one) - its housework Jim, but not as we know it!


Si's house/space-age apartment with only two rooms(!)


In order to create the kitchen, first of all, I needed a total of four walls - any less and there would be the problem of attaching a roof to the place!
To make sure I didn't get a screen full of red walls, I decided to construct two first of all and align them as shown.
I was to use the 'Align-Selection' tool to allow the positioning of all four walls a mite easier; especially due to Max relying of all three axis to keep order within the numerous objects
So, I made sure that the first two were crossing directly and then I moved on...

^ The image shows the default settings that the align selection tool uses as a starting point
note: I have also made sure that I selected the bisecting wall before attempting this^


The wall marked '1' has now been re-positioned as shown. The 'world align position' chosen was 'X', with current object set as 'min' and target object set to 'max'
Because Max recognises that the lateral movement of the object is attributed to the figure of 'X', then all the wall has done is shifted along the lateral path and stuck to a predetermined course
By using this tool, I then take a copy of the settings used for use with the other wall if, as a precaution, the cloning of these two walls did not allow the 'align' tool to be used...


^One last alteration; by un-checking the 'world align position', the wall now moves into the exact place (the wall in the rear is where the sink will be, and the wall that has been re-positioned is the supposed 'garden' or 'side' wall)^


My theory of cloning the two walls actually paid off and, with only a couple of minutes of minor adjustments, the walls seemed to line up when brought together on a defined axis...
Now, I was able to concentrate on the design of the walls. I didn't want just plain, flat walls, as this would appear far too human.
I decided to use a tool I hadn't tried for a while: 'taper'
Once the wall as a poly had been selected, I used the taper modifier the create a wall that was characteristically rhombus-like in its form; a flat edge, with four other angled sides behind it - very nice, I thought, and very space-age too!

^I moved the wall into the centre, as a guide to where it could be, especially since the idea that whatever I adjusted on this original wall, all the other walls, since I had cloned them as 'instances', would mirror those actions. This saved me quite a bit of time, I'm glad to say!^

Now, all the walls has been automatically adjusted in exact the same settings as 'wall 1', I could simply bring them together like so and make sure it was a plausible modification, and that it wouldnt hinder either further re-scalign of the room itself, or create far too many surface which artificial lights sources in Max's pre-sets would simply glare over.
Luckily, Max will allow any trials of possibilities and, although I didn't take a screenshot of them, I tried a few versions of artificial lights, with spots, omnis and targets, all of which did not create too many unwanted extremes in exposure (I'm aiming for natural looking ceiling-lit rooms at least)

^The creation of the floor, which I carefully made sure measured up to the sides of the walls - using the cloning tool and changing the graphical view to 'wireframe', I could see the outlines of all the wall (shown in red and white) as well as the floor (just a generated plane given depth, shown in green)^

Part 2 will be on the way - a chance to me to flex my interior design muscles, even if having no experience in space-age interiors could cost me at the start...