Though initially complex, the students video was narrated and was easy to follow, meaning that everyone could get a hang on which buttons to press and which numbers to put in.
This is the method and objects which I used to demonstrate what I had learnt...
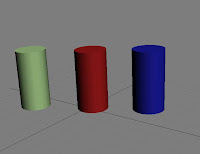
 ^Started off with a cylinder, named it 'green' and then cloned it as a 'copy' twice, naming the two copies 'red' and 'blue' respectively^
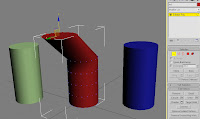
 ^ I then converted the red cylinder to an editable poly, went into sub-object level, selected vertices's, highlighted its upper section and then pulled it outwards, as the image shows^
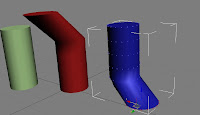
 ^ As a direct opposite, I then followed the process as described above, but I pulled the lower section outwards, like so...^
 ^ I then returned to the green cylinder, selected the 'morph' option from the modifiers, where I was presented with the menu you see on the right side of the image above. I double-clicked on the first marker tab, and then the 'pick object from scene' button. This meant that I could click on the red cylinder, which added it to the marker tab, with the bar on the left going green to indicate its selected - this process was repeated for the blue cylinder
 ^I moved onto the next part. Selecting 'auto-key', I pulled the 'frame-bar' along to 50 and then pushed the percentage of morph next to the red cylinders marker tab up to 100% (this meant the green cylinder's upper half would mirror the movements of the red cylinder!)
I then moved the 'frame-bar' to 100 frames, again upping the percentage on the blue cylinder to 100% ( the green cylinder now has both section mirroring the respective coloured-cylinder)^
I could then alter the percentage of both of then along the timeline, so that the green cylinder would alter its morph-state to appear more or less like its clones
To illustrate my perhaps slightly convoluted explanation of what I learnt, I have included the video created with this process...


No comments:
Post a Comment