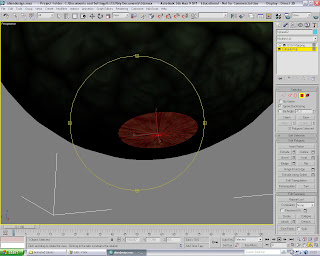
Once I had finished with Si's head, I decided that in order create the body I imagined in my head, I would need to 'extrude' and 'bevel' selected polygons from his head.
Firstly, due to his head being circular, I needed to select, with 'ignore backfacing' checked, a similarly circular area of polygons at the base of the head and flatten them out by shifting them upwards until they were almost parallel.
By doing this I then had a clean area from which I could accurately begin 'beveling' (I planned to use a repetitive process of beveling and extruding outwards and, as I went further down, his body would appear more bulbous and bloated.
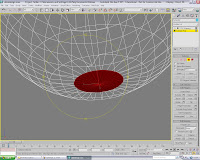 ^The image shows how beneficial choosing a wireframe view is when a user is in the process of selecting so many individual polys and vertices!^
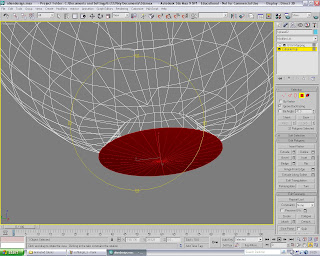
Once all the relevant polygons had been selected, I then chose the bevel tool and began to pull out the required amount of material from the wire-framed head of Si.
I was trying to create him into what would almost instantly be recognisable to a average viewer and giving Si this bulbous appearance, with exposed tentacles at the base of his body to aid his mobility (very 'sci-fi'!) and two short, stubby arms (that will possibly only have the wrists, shoulder and three-finger joints moving!), I feel that the persona he portrays with his facial features certainly displays an attitude of dislike of the situation, if only for these three scenarios...
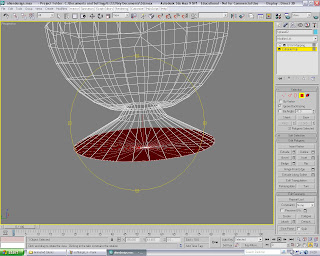 ^As you can see, the 'bevel' tool allowed a greater degree of control over even the extrude tool, as I was able to pull the existing form outwards and create this almost canopy-like coverage as his body took shape the further I went along^
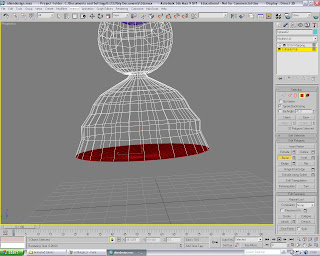
The process was actually a very interesting method in which an individual could almost create a whole 'form' from just a sphere, using the 'bevel' tool.
In the image, I have gradually tapered the shape and tried to be as uneven as possible, but also still intend on making the lower section as expansive as possible (a big foot/tentacle print!)
The only thing I was worried about at this point was that once I have re-selected the 'Mesh-Smooth' mod, would I just become a over-sized blob, with a disjointed and disproportionate head atop...
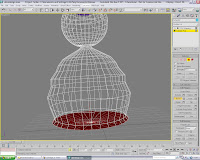 ^The finished form of Si in wire-frame mode. At this stage I tried to create the tentacles, but unfortunately they weren't turning out the way I hoped they would, appearing as slim blocks sticking outwards, even with the 'Mesh-Smooth' mod on...^
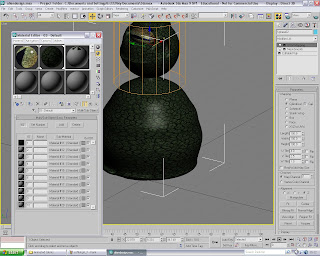
As stated in the title, this is the finished form, but I'm not completely happy with it(I may not have time to change it drastically, but it could just be a case of slimming and enlarging certain areas!)
Just at the base you can see the tentacles at their baby stage, even though it is pretty simple for me to revert to the 'Editable Poly' level and increase their length without too much hassle.
The texture used here is, of course, the same as whats on Si's head, and I do still feel its suits the overall effect and art-style of the Sci-Fi subject matter. And, again, the cylinder mapping parameter was used, but I unselected the 'cap' for the body to avoid discrepancies in his neck
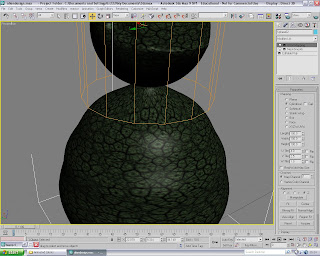 ^Shown above is the example of why I un-checked the 'cap' within the cylinder map parameter - I may also point out the specular detail I added in to make Si's skin appear slightly moist or smooth enough to reflect any generated light sources I will be adding into the scenes...^
That is enough of Si for the moment; next post concentrates of the creation of the kitchen (and how well the mapping and lighting seemed to go for me, even if the creation of the archway needed to be restarted a couple of times!)
Firstly, due to his head being circular, I needed to select, with 'ignore backfacing' checked, a similarly circular area of polygons at the base of the head and flatten them out by shifting them upwards until they were almost parallel.
By doing this I then had a clean area from which I could accurately begin 'beveling' (I planned to use a repetitive process of beveling and extruding outwards and, as I went further down, his body would appear more bulbous and bloated.
 ^The image shows how beneficial choosing a wireframe view is when a user is in the process of selecting so many individual polys and vertices!^
Once all the relevant polygons had been selected, I then chose the bevel tool and began to pull out the required amount of material from the wire-framed head of Si.
I was trying to create him into what would almost instantly be recognisable to a average viewer and giving Si this bulbous appearance, with exposed tentacles at the base of his body to aid his mobility (very 'sci-fi'!) and two short, stubby arms (that will possibly only have the wrists, shoulder and three-finger joints moving!), I feel that the persona he portrays with his facial features certainly displays an attitude of dislike of the situation, if only for these three scenarios...
 ^As you can see, the 'bevel' tool allowed a greater degree of control over even the extrude tool, as I was able to pull the existing form outwards and create this almost canopy-like coverage as his body took shape the further I went along^
The process was actually a very interesting method in which an individual could almost create a whole 'form' from just a sphere, using the 'bevel' tool.
In the image, I have gradually tapered the shape and tried to be as uneven as possible, but also still intend on making the lower section as expansive as possible (a big foot/tentacle print!)
The only thing I was worried about at this point was that once I have re-selected the 'Mesh-Smooth' mod, would I just become a over-sized blob, with a disjointed and disproportionate head atop...
 ^The finished form of Si in wire-frame mode. At this stage I tried to create the tentacles, but unfortunately they weren't turning out the way I hoped they would, appearing as slim blocks sticking outwards, even with the 'Mesh-Smooth' mod on...^
As stated in the title, this is the finished form, but I'm not completely happy with it(I may not have time to change it drastically, but it could just be a case of slimming and enlarging certain areas!)
Just at the base you can see the tentacles at their baby stage, even though it is pretty simple for me to revert to the 'Editable Poly' level and increase their length without too much hassle.
The texture used here is, of course, the same as whats on Si's head, and I do still feel its suits the overall effect and art-style of the Sci-Fi subject matter. And, again, the cylinder mapping parameter was used, but I unselected the 'cap' for the body to avoid discrepancies in his neck
 ^Shown above is the example of why I un-checked the 'cap' within the cylinder map parameter - I may also point out the specular detail I added in to make Si's skin appear slightly moist or smooth enough to reflect any generated light sources I will be adding into the scenes...^
That is enough of Si for the moment; next post concentrates of the creation of the kitchen (and how well the mapping and lighting seemed to go for me, even if the creation of the archway needed to be restarted a couple of times!)

No comments:
Post a Comment